PromptLogic User Guide
Welcome to the official user guide for PromptLogic — a Windows‑native teleprompter engine that drives your presentation from multiple sources.
Whether you’re presenting from PowerPoint, reading from a script file, or running a full OBS production, this guide shows you how to load content, control playback, and automate your workflow with dot‑commands.
1. Introduction
PromptLogic is a lightweight, Windows‑native teleprompter engine that works with multiple content sources — PowerPoint slide notes, plain‑text script files, and OBS.
It’s built for presenters, educators, and creators who want predictable scrolling, simple automation, and a workflow that adapts to slides, scripts, or full broadcast setups.
PromptLogic reads your content, scrolls it smoothly, and executes dot‑commands that automate your presentation or production. Whether you’re advancing PowerPoint slides, running a script, or switching OBS scenes, PromptLogic keeps your workflow simple and hands‑free.
2. What PromptLogic can do
PowerPoint Integration
- Reads script directly from slide notes
- Tracks slide position automatically
- Executes dot‑commands embedded in your notes
Text‑Based Script Files
- Opens .txt and .md scripts
- Scrolls with deterministic smoothness
- Supports the same dot‑commands used in PowerPoint
OBS Integration
- Connects via OBS WebSocket
- Switches scenes, triggers transitions, and controls sources
- Enables full OBS‑only productions with no PowerPoint require
Teleprompter Engine
- Smooth, adjustable scrolling
- Highlight band for easy reading
- Multiple display modes (full, compressed, borderless)
Automation via Dot‑Commands
- .start, .stop, .pause, .pause<n>, .nextslide, and more
- Timing, cues, and OBS actions embedded directly in your script
3. System Requirements
- Windows 10 or Windows 11
- Microsoft PowerPoint installed (required only if you plan to use PowerPoint mode)
- OBS Studio installed (required only if you plan to use OBS automation)
- Permission for PromptLogic to automate PowerPoint
- Permission for PromptLogic to connect to OBS via WebSocket
PromptLogic communicates with PowerPoint using standard Windows automation.
If PowerPoint asks for permission, choose Allow.
To use OBS features, OBS must have the WebSocket server enabled.
PromptLogic will attempt to connect automatically; if OBS prompts for access, choose Allow.
4. Getting Started
Launching PromptLogic
Start PromptLogic like any other Windows application.
When it opens, it determines the correct mode automatically:
- If PowerPoint is already running with a presentation open:
PromptLogic enters PowerPoint Mode and reads the notes from the active slide.
- If PowerPoint is not running:
PromptLogic opens a file selection dialog where you can choose either:
- a PowerPoint .pptx file (PromptLogic will launch PowerPoint and load the notes), or
- a text script (.txt or .md).
Loading Your Content
PowerPoint File (.pptx)
If you select a .pptx file:
- PromptLogic launches PowerPoint (if not already running)
- Loads the presentation
- Reads the notes for the current slide
- Tracks slide changes automatically
This is full PowerPoint Mode.
Text Script File (.txt or .md)
If you select a text script:
- PromptLogic loads the entire script
- Prepares it for scrolling
- Executes dot‑commands as they appear
If one of the first commands is: .ppt_enable(
)
PromptLogic will:
- Launch PowerPoint
- Load the specified presentation
- Use the text file as the primary script, with PowerPoint available only for slides or visual cues
This is Script Mode with optional PowerPoint support.
OBS Integration
OBS is never auto‑launched.
It is only enabled when your script explicitly requests it.
If your script contains: .obs_enable
PromptLogic will:
- Attempt to connect to OBS via WebSocket
- Enable OBS scene switching, source control, and other OBS‑related dot‑commands
This works in both PowerPoint Mode and Script Mode.
Starting the Teleprompter
Once your content is loaded:
- <Press Start>
- The teleprompter begins smooth scrolling
- Dot‑commands execute automatically, including:
- PowerPoint slide control
- Timing and pauses
- OBS scene changes
- Mode‑switching commands like .ppt_enable or .obs_enable
PromptLogic keeps your hands off the keyboard and your workflow predictable.
The teleprompter will scroll the notes smoothly. Any dot‑commands in the script will be executed automatically.
5. Writing Scripts
Your script can live either in the PowerPoint Notes pane or in a plain‑text file (.txt or .md).
PromptLogic reads the text exactly as written and executes dot‑commands as it encounters them,
regardless of which source you use.
- In PowerPoint Mode, your script is the notes attached to each slide.
- In Script Mode, your script is the entire text file you opened.
- Dot‑commands work the same in both modes.
This keeps your workflow flexible: write inside PowerPoint when your script is tied to slides, or use a text editor when you want a single continuous script.
Guidelines:
- Write your script normally
- Place dot‑commands on their own line
- Keep paragraphs short for easier reading
- Test your script before presenting
Example
Welcome to the presentation. Today we’ll cover three main topics.

.nextslide

This slide introduces the first topic. Speak slowly and clearly.

.pause

When ready, continue to the next section.

.stop
6. Dot Commands (v2)
Dot‑commands are simple instructions embedded in your script.
They must appear on their own line and begin with a period.
Slide control commands
.nextslide
Advances PowerPoint to the next slide automatically.
.pause
Pauses scrolling until you manually resume.
.pause(<n>)
Pauses scrolling the the number of milliseconds provided in (n)
ex. n = 1000 would pause for 1 second.
.stop
Stops scrolling entirely. Useful at the end of a section or presentation.
OBS Commands
.obs_mute(<InputName>)
Mute the specified input.
.obs_unmute(<InputName>)
UnMute the specified input.
.obs_scene(<SceneName>)
Selects the specified Scene.
.obs_record_start()
Starts Recording.
.obs_record_stop()
Stops Recording.
.obs_source_show(<SceneName>,<Source>)
Shows the specified source contained in the specified scene.
.obs_source_hide(<SceneName>,<Source>)
Hides the specified source contained in the specified scene.
.obs_transition(<TransitionName>)
Specifies the transition to use when switching scenes.
Process Control Commands
.ppt_enable(<FilePath>)
- Only used in script mode.
- Placed as one of the first commands in the script.
- FilePath is the full path to the PowerPoint file. You may use local paths or UNC network paths, as long as the UNC path references a real share.
.obs_enable(<SceneCollection>)
- Connects to OBS via WebSocket
- Enables all OBS-related dot-commands
- Does launch OBS, activates OBS control if OBS is running
- SceneCollection specifies which OBS scene collection PromptLogic should use when OBS is enabled.
Special Case
.start(<FilePath>)
Restarts the slide show from the begining.
Important:
Important:
.start is only meaningful when it appears immediately after a .stop at the end of a script.
Because dot‑commands only execute while the script is actively scrolling:
- .start cannot begin scrolling
- .start cannot resume scrolling
- .start cannot run while paused or stopped
The only valid pattern is:
.stop
.start
This sequence:
- .stop resets the slideshow to slide 1
- .start immediately restarts scrolling from the beginning
- Both commands execute because the script is still running until EOF
This is the sole scenario where .start is reachable and meaningful.
Example Usage
This is the end of the introduction.

.nextslide

Here begins the next slide's content.
7. Teleprompter Controls
- Start – Begin scrolling
- Pause – Temporarily stop scrolling
- Resume – Continue scrolling after a pause
- Speed – Adjust scroll speed
- Highlight Band – Keeps your eyes centered on the active line
7.1 Display Modes
PromptLogic provides four display modes that let you choose how much on-screen Control
you want while presenting. These modes affect how the control panel appears and how you
interact with the teleprompter.
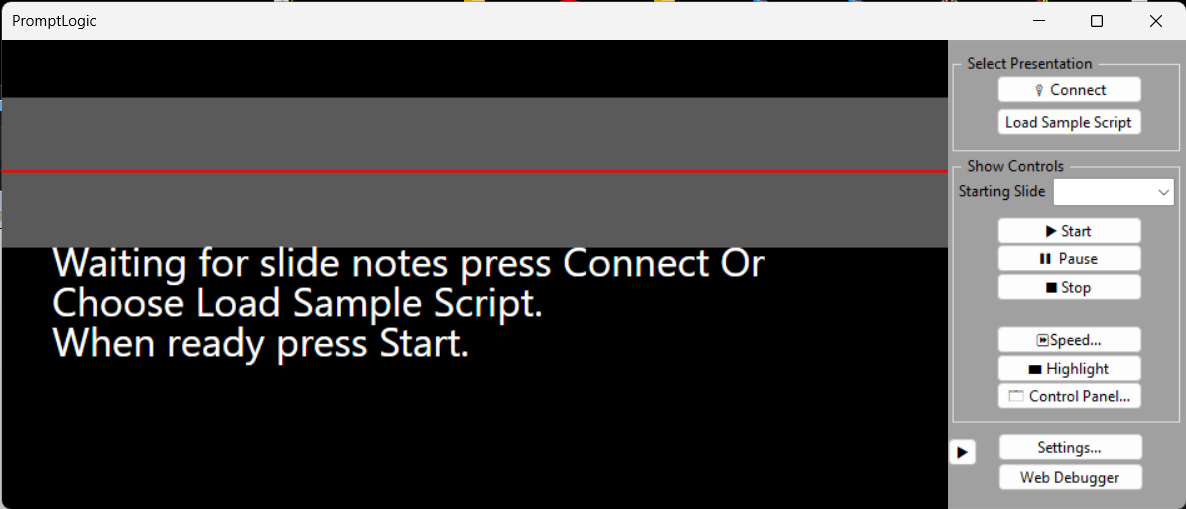
Full Control Panel
The full control panel is visible on the right side of the window and provides access to all controls,
including speed, highlight band, and PowerPoint connection tools.
Use this mode when:
- Editing or preparing your script
- Adjusting settings frequently
- Testing dot-commands
How to enter this mode:
If the control panel is not visible you must first make the control panel visible by
Right-clicking anywhere and choosing Control Panel -> Show. Then you can either
- Click the expand icon to expand a compressed control panel, or
- Right-click anywhere and choose Control panel -> Uncompress
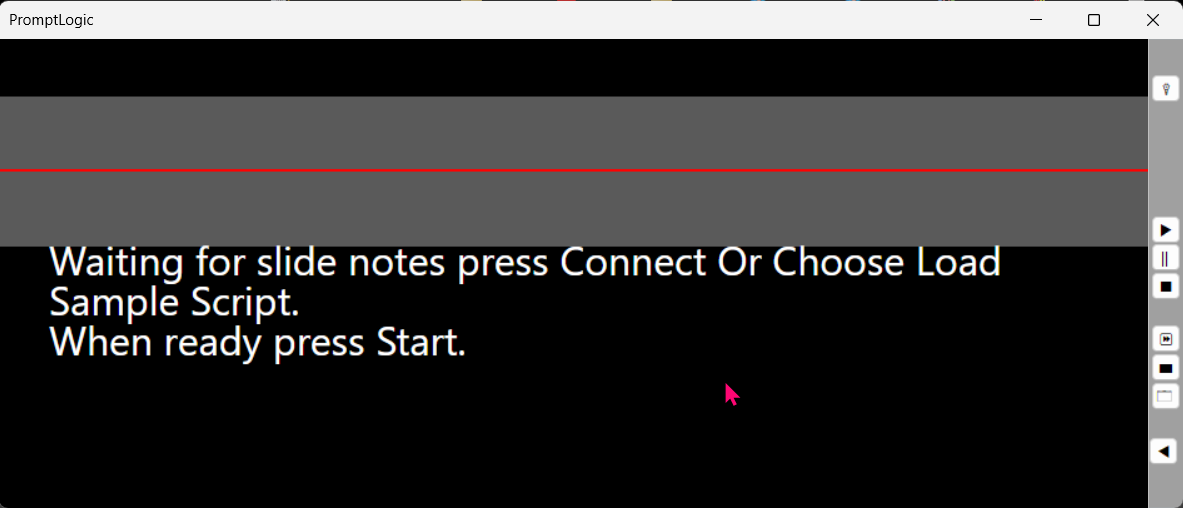
Compressed Control Panel
The control panel collapses into a slim bar, giving more vertical space to your script while still keeping
essential controls available.
Use this mode when:
- Rehearsing
- You want more screen space but still need quick access to controls
How to enter this mode:
If the control panel is not visible you must first make the control panel visible by
Right-clicking anywhere and choosing Control Panel -> Show. The you can either
- Click the compress icon in the full control panel, or
- Right-click anywhere and choose View -> Show Compressed Panel
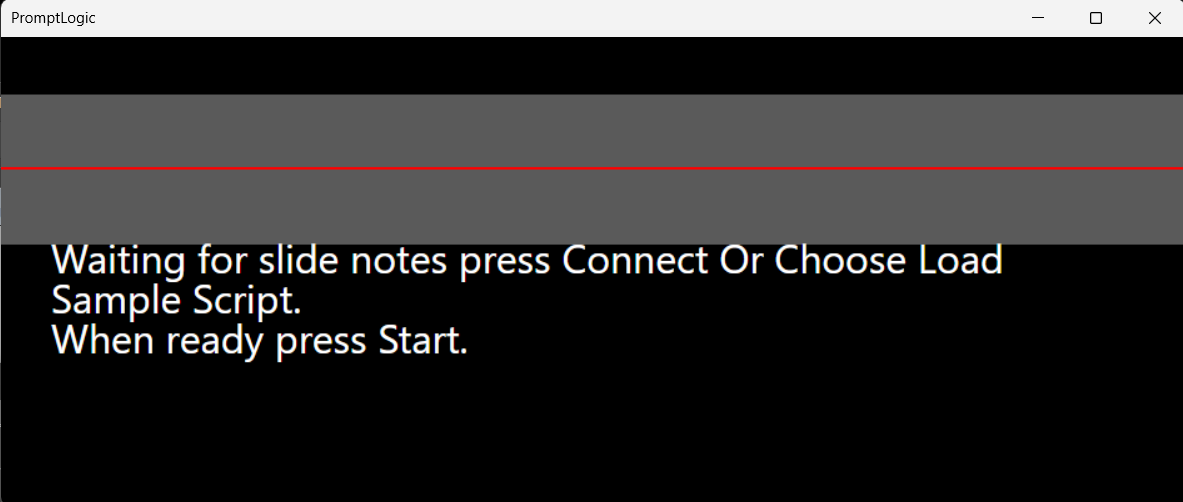
No Control Panel
The control panel is completely hidden, allowing the script to fill the entire window.
All actions are preformed through the right-click menu.
Use this mode when:
- Presenting live
- You want a distraction-free reading environment
How to enter this mode:
- Click the Hide Panel on the control panel
- Right-click and choose Control Panel -> Hide
How to return:
- Right-click anywhere and choose View -> Show Control Panel
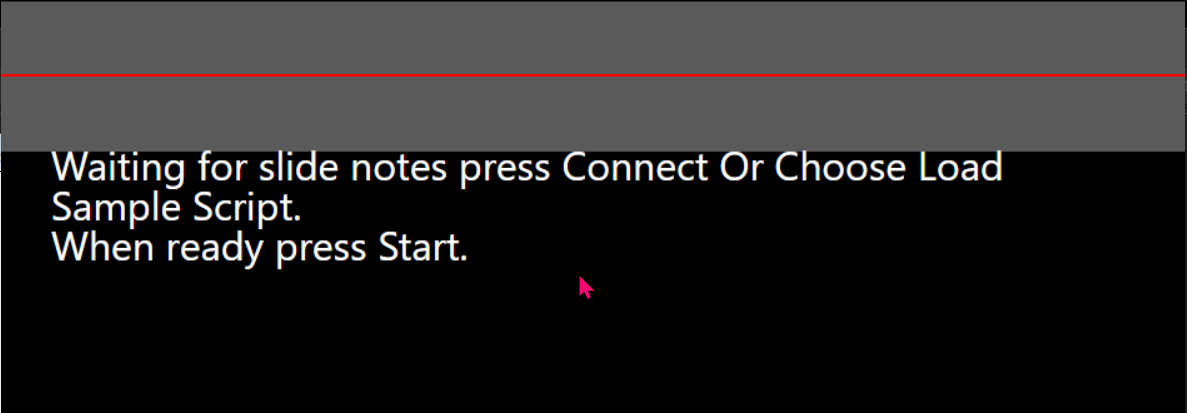
Borderless
Borderless removes the windows frame entirely, allowing you to position the teleprompter directly beneath
your camera for the most natural eye contact possible. This mode is ideal when presenting on a webcam,
recording video, or using a teleprompter glass setup.
Use this mode when:
- You want your eyes to stay aligned with the camera
- You're recording video and need a clean, unobstrusive telepompter
- You're using a physical teleprompter rig or a beam-splitter glass
What changes in this mode:
- The title bar and window borders are hidden
- The scrip fills the entire window area
- You can still right-click to access all the controls
- You can drag the window by Left-Click anywhere on the screen
- You can resize the window by moving the cursor over an edge until
the directional arrows show and Left-Click and drag
How to enter Borderless Mode:
- Choose Border -> Hide from the right-click menu
- Or click the Borderless button in the control panel
How to exit Borderless mode:
- Choose Border -> Show from the right-click menu
- Or click the Borderless button on in the control panel
8. Tips for Smooth Presentations
- Place dot‑commands on their own line
- Use short paragraphs for readability
- Test your script before presenting
- Keep your speaking pace in mind when setting scroll speed
- Use
.pause before complex explanations
PromptLogic — Creatively Applying Technology to Presentation